Drying Kitchen Herbs: Comparing Air-Dry, Oven, and Dehydrator Methods
Drying herbs is one of the simplest ways to preserve a summer harvest and keep fresh flavors on the shelf through colder months. The method you choose affects flavor, aroma, texture and the time required. Below is a focused comparison of three widely used approaches — air-drying, oven-drying and using a dehydrator — followed by clear guidance to help you pick the best option for specific herbs and household situations.
Approach comparison: principles, pros and cons
Air-drying
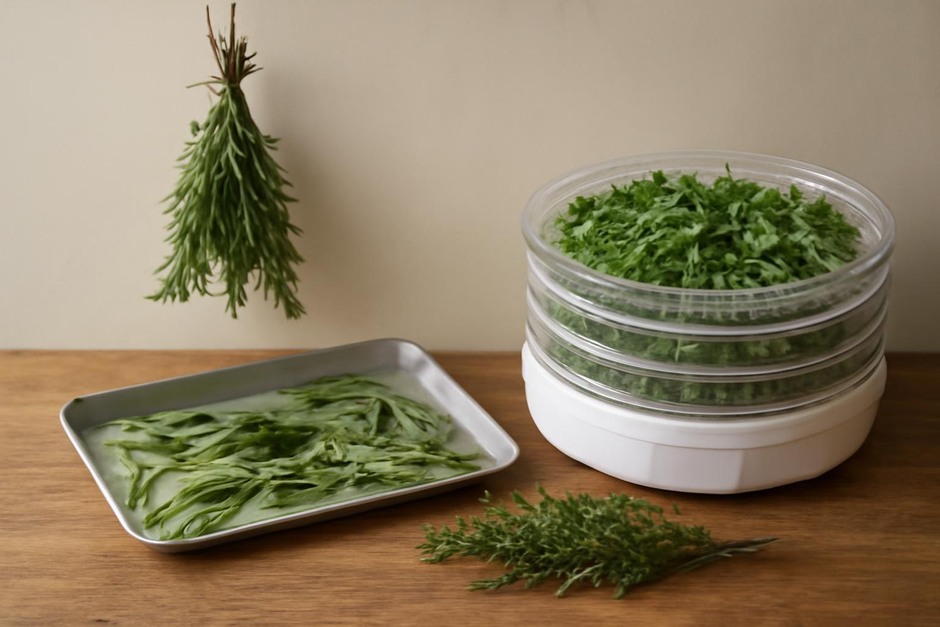
- Principle: Hang small bunches of stems in a warm, dry, well-ventilated spot until leaves are crisp and stems break easily.
- Best for: Woody, sturdy herbs such as rosemary, thyme, oregano and sage.
- Time: Several days to two weeks, depending on humidity and airflow.
- Pros: Energy-free, gentle on flavor and aroma, inexpensive, minimal equipment.
- Cons: Slow; not suitable in humid environments; leafy herbs (e.g., basil) can blacken or rot instead of drying.
- Small example: Tie five to eight rosemary sprigs together, hang upside down in a cool, airy cupboard away from direct sunlight. In about 7–10 days the needles will snap off cleanly.
Oven-drying
- Principle: Use low oven heat to remove moisture quickly from leaves laid on a baking tray.
- Best for: Quick drying of small batches, and for herbs that don’t tolerate long ambient drying, such as basil or parsley.
- Time: 20–90 minutes at the lowest oven setting, with frequent checks.
- Pros: Speed; reliable even in humid climates; no special appliance required.
- Cons: Risk of overheating and loss of volatile oils (aroma), uneven drying, and possible browning if left too long.
- Small example: Scatter basil leaves in a single layer on a tray, set the oven to the lowest temperature (or use residual heat after turning it off at 80–90°C/175–195°F equivalent), and check every 10–15 minutes until leaves are brittle but still green.
Dehydrator
- Principle: Circulating low heat and airflow remove moisture evenly across stacked trays.
- Best for: Medium-to-large batches and a wide variety of herbs, particularly useful where consistent results are desired.
- Time: 2–8 hours depending on thickness of leaves and dehydrator settings.
- Pros: Controlled temperature and airflow give uniform drying with good retention of flavour; energy-efficient versus long oven use; hands-off operation.
- Cons: Requires a purchase; takes counter space; batch size limited by tray area.
- Small example: Lay thyme sprigs on dehydrator trays with leaves facing up. Set to 40–45°C (104–113°F) and check after 2–3 hours for crispness.
Choosing between methods: practical guidance
- Match method to herb type:
- Woody herbs (rosemary, thyme, oregano): air-dry or dehydrator for best aroma retention.
- Leafy herbs (basil, parsley, cilantro): oven or dehydrator for speed and to avoid mold; consider freezing if you want fresh green color.
- Delicate herbs (tarragon, chervil): dehydrator at low temperature preserves flavor; short oven bursts may work but risk loss of nuance.
- Consider your climate and timing:
- If you live in a humid region or the season is damp, avoid air-drying — use an oven or dehydrator to reduce risk of mildew.
- If you have time and dry air, air-drying is the most energy-efficient option for sturdy herbs.
- Think about quantity and frequency:
- For occasional small batches, oven-drying works well without extra equipment.
- For regular preservation or larger harvests, a dehydrator pays off in consistency and convenience.
- Prioritize flavor vs. convenience:
- If maximum aroma matters (e.g., oregano for finishing dishes), choose air-dry or a low-temperature dehydrator program.
- If speed is critical (you picked basil and want to store it today), oven-drying or freezing are more practical.
Finish: storing and using dried herbs
Regardless of method, store dried herbs in airtight containers away from heat and light. Crumble leaves only when ready to use; whole leaves keep flavor longer. Label jars with the herb name and date. As a rule of thumb, dried leaves keep good flavor for about 6–12 months.
Small habit examples to try this weekend: air-dry a few bunches of rosemary hung above the sink; oven-dry a tray of basil at low heat and compare aroma to a basil batch you freeze; or run a small tray of thyme through your dehydrator and note how evenly it dries. These quick experiments will help you see the trade-offs in your own kitchen and guide future choices.